Integrate Google Sheets with Next.js: A Full-Stack Guide
Learn how to store data directly from your Next.js React TypeScript app into Google Sheets using the Google Sheets API. A step-by-step tutorial.

Are you building a full-stack web application with Next.js, React, and TypeScript and need a simple way to store form submissions or other data? Look no further than Google Sheets! This powerful, cloud-based spreadsheet can serve as a convenient and easily accessible data store.
In this article, I’ll walk you through the entire process of connecting your Next.js application to Google Sheets using the Google Sheets API v4. Get ready to ditch complex databases for a simple and efficient solution. You can also see an implementation of this in my Issue Tracker App
If you are a friend of automation like me, you will love this!
Why Use Google Sheets with Next.js?
Before we dive in, let’s consider the advantages of this approach:
- Ease of Use: Google Sheets is familiar and intuitive for most users.
- Accessibility: Data is readily available in a collaborative, cloud-based environment.
- Simplicity: Avoid the overhead of setting up and managing a dedicated database (especially for smaller projects).
- Data Analysis: Leverage Google Sheets’ built-in charting and analysis tools.
- Rapid Prototyping: Quickly prototype data capture features without complex backend configurations.
- Cost-Effective: Google Sheets is free for personal use and offers a generous quota for API requests.
Prerequisites
- Basic knowledge of React, Next.js, and TypeScript.
- A Google account.
- Node.js and npm (or yarn) installed.
- Familiarity with REST APIs and JSON.
What we need to get started
I assume you already have a Next.js application set up and a form ready to capture data.
Before we can start integrating Google Sheets with our Next.js application, we need to set up a few things. These are the following:
- A Google Cloud Platform (GCP) project with the Google Sheets API enabled.
- A service account with the necessary permissions to access your Google Sheets.
- A Google Sheet created and shared with the service account email.
Step-by-Step: Integrating Next.js with Google Sheets
Step 1: Create a Google Cloud Project
-
Create a Google Cloud Project: Go to the Google Cloud Console and create a new project (if you don’t already have one).
-
Enable the Google Sheets API: Navigate to the API Library, search for “Google Sheets API,” and click “Enable.”

Step 2: Create a Service Account
Back to the Google Cloud Console:
-
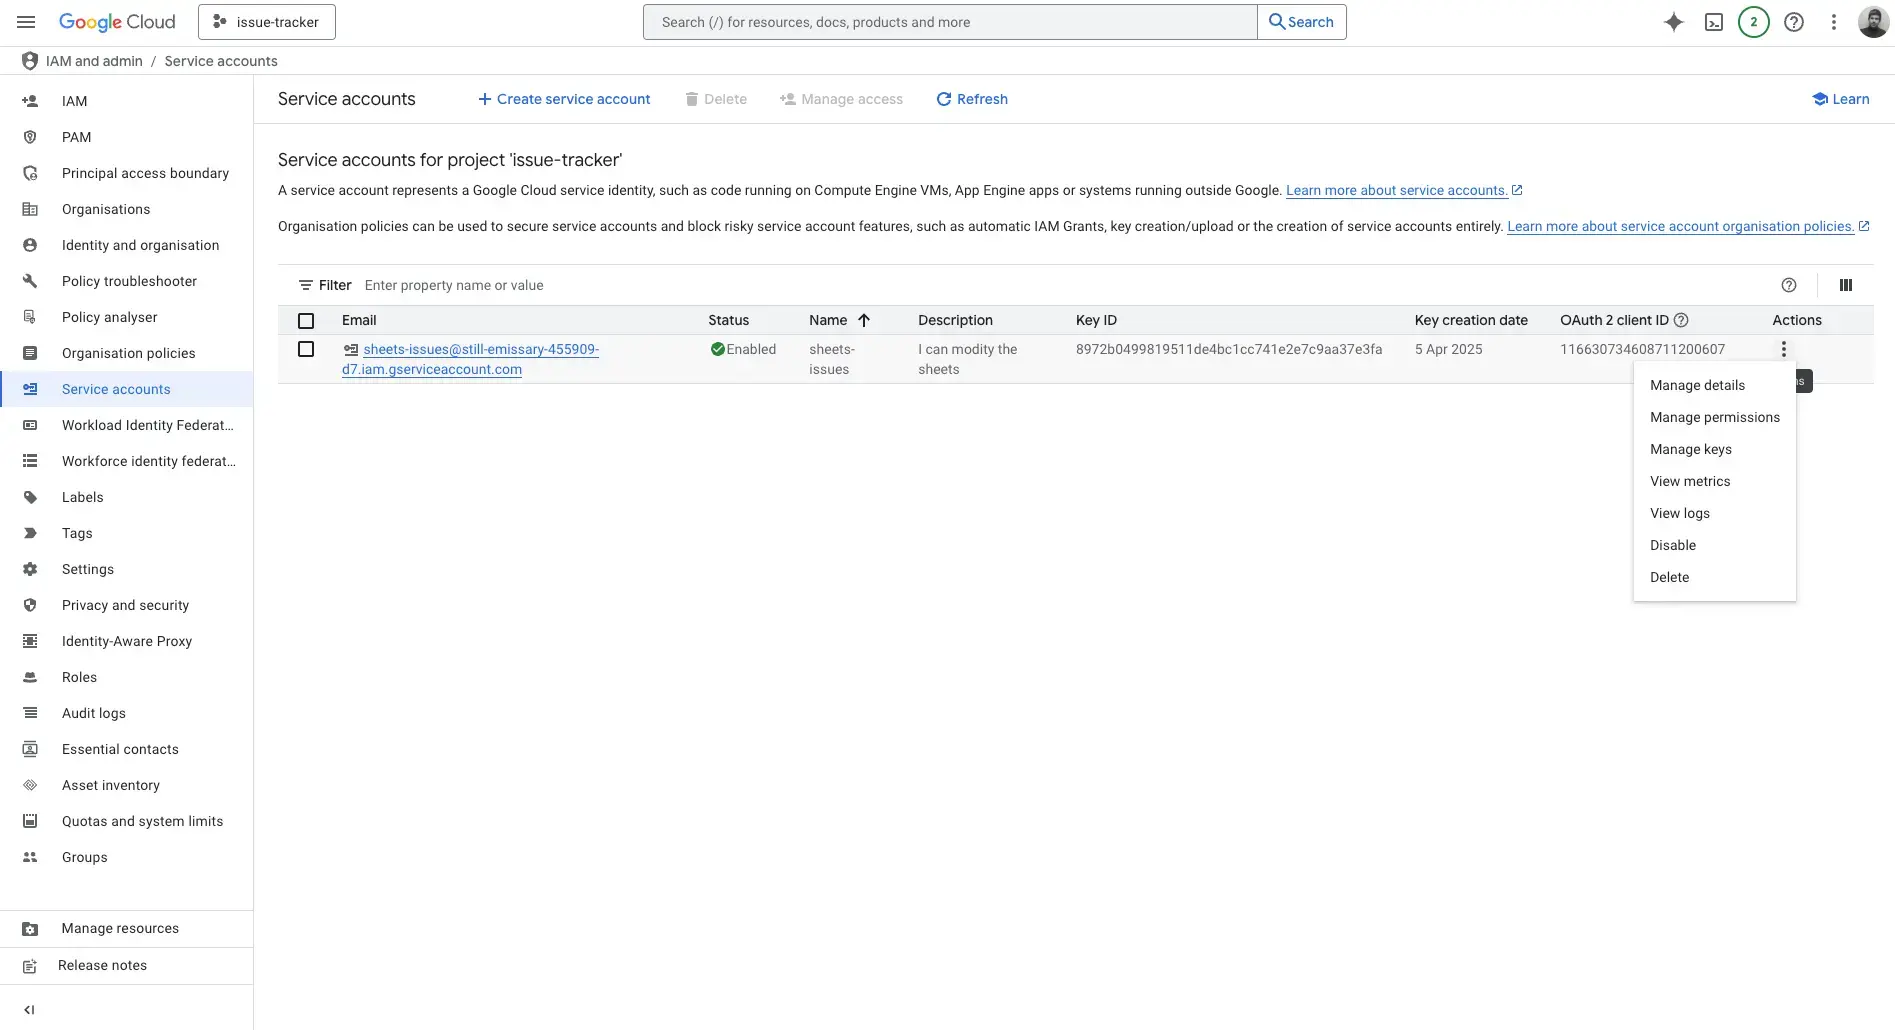
Go to “IAM & Admin” > “Service Accounts” in the Cloud Console.
-
Click “Create Service Account.” Provide a name and description for the service account. It can be anything you like.
-
Grant the service account the “Editor” role (Project > Editor) during service account creation for the project. In production it is better to create custom roles instead of giving editor permission.
-
Click “Done” to create the service account.
Step 3: Generate a JSON Key for the Service Account
-
Locate the service account you created in the list and select “Manage Keys.” (the three dots on the right side of the service account).
-
Click “Add Key” > “Create New Key.”
-
Choose “JSON” as the key type and click “Create.” This will download a JSON file containing your private key. Store this file securely.
Step 4. Share Your Google Sheet with the Service Account
-
Open the Google Sheet you want to use.
-
Click the “Share” button.
-
Enter the email address of the service account (found in the JSON key file or the Cloud Console) and grant it “Editor” access. For example, in my test project, the email was
sheets-issues@still-emissary-455909-d7.iam.gserviceaccount.com -
Click “Send.”
Also, you can already add the necessary headers in the first row in this step.
Step 5: Prepare the env variables
Create a .env file (if you don’t have one) in the root of your Next.js project and add the following environment variables:
GOOGLE_SHEETS_PRIVATE_KEY="-----BEGIN PRIVATE KEY-----\nMII...YOUR_PRIVATE_KEY...\n-----END PRIVATE KEY-----\n"
GOOGLE_SHEETS_CLIENT_EMAIL="your-service-account@your-project-id.iam.gserviceaccount.com"
GOOGLE_SHEETS_SPREADSHEET_ID="your-spreadsheet-id"  // You find this one in the URL of your Google Sheet, before "/edit". It can look like this: 1BxiMVs0XRA5nFMd4e2c3Z3v4g5g
GOOGLE_SHEETS_RANGE="Sheet1!A:G" // Optional: The range you want to write to.
Important:
- Replace the placeholder values with your actual credentials.
- Store your
.envfile securely and never commit it to your repository. - Specifically, do not escape the newlines (\n) inside the PRIVATE KEY variable.
Step 6: Installing the required packages
Run the following command in your Next.js project:
npm install googleapis
Step 7: Using server actions
Create a server action in your Next.js app (e.g., in src/app/actions.ts) to handle the data injection.
One of the easiest possible implementations might look like this:
'use server'

import { google } from 'googleapis';

export async function appendToGoogleSheet(data: any) {
  try {
    const auth = new google.auth.JWT({
      email: process.env.GOOGLE_SHEETS_CLIENT_EMAIL,
      key: process.env.GOOGLE_SHEETS_PRIVATE_KEY.replace(/\\n/g, '\n'),
      scopes: ['https://www.googleapis.com/auth/spreadsheets'],
    });

    const sheets = google.sheets({ version: 'v4', auth });

    const rowData = [
      new Date().toISOString(), // Timestamp
      data.name,
      data.email,
      data.message,
      // Add other data fields here
    ];

    const response = await sheets.spreadsheets.values.append({
      spreadsheetId: process.env.GOOGLE_SHEETS_SPREADSHEET_ID,
      range: process.env.GOOGLE_SHEETS_RANGE || 'Sheet1!A:G', // Default to first sheet
      valueInputOption: 'USER_ENTERED',
      requestBody: {
        values: [rowData],
      },
    });

    return response.data;
  } catch (error) {
    console.error('Error appending to Google Sheet:', error);
    return null; // Or throw an error if you prefer
  }
}
Step 8: Call the server action from your form
Import the server action into your React component and call it when your form is submitted (and hopefully validated!).
import React from 'react';
import { appendToGoogleSheet } from './actions';

const MyForm = () => {
  const handleSubmit = async (event: React.FormEvent) => {
    event.preventDefault();
    const formData = new FormData(event.currentTarget);
    const data = {
      name: formData.get('name'),
      email: formData.get('email'),
      message: formData.get('message'),
    };

    const result = await appendToGoogleSheet(data);
    if (result) {
      console.log('Data appended to Google Sheet!');
    } else {
      console.error('Failed to append data.');
    }
  };

  return (
    <form onSubmit={handleSubmit}>
      {/* Your form fields here */}
      <button type="submit">Submit</button>
    </form>
  );
};

export default MyForm;
Et voilà! You have successfully integrated Google Sheets with your Next.js application. When the form is submitted, the data will be appended to your Google Sheet. As mentioned above, nothing stops you now from creating some Issue Trackers, or any other kind of application that needs a simple data store.
Conclusion
Integrating Google Sheets with your Next.js application provides a simple and efficient way to store data for smaller projects or rapid prototyping. By following these steps, you can quickly connect your frontend to a readily accessible data store and leverage the power of Google Sheets for your full-stack development needs.
Questions about Using Google Sheets API in Next.js
Ensure that you have shared the Google Sheet with the service account's email address and granted it "Editor" access. Also, verify that the service account has the necessary roles in the Cloud Console.
Share article